Getting Started: How to Create Training Content and Exams
This system is a very universal, open system for creating content. You can include several types of content in your training, in any order, unlimited amount. Anything that can go on a website can go into your content.
© 2026 Aerostudies Inc. All rights reserved. Narration in this video was generated using AI text-to-speech. All content, scripts, and information are written and owned by Aerostudies Inc.
Jump to: Review Question, Exam, Survey
Prepare your Content
We recommend that authoring (writing) your content NOT be done online. Web-based editors are not optimal for authoring. If you are writing your material, write it out in something like Microsoft Word or any other text editor / word processor first. That way, you can write, edit, and make notations about where the online course page breaks should be, what images, videos, etc. should be on the page, etc. It is MUCH easier and quicker to write it all out off-line first, then copy and paste the text in to the online editor.
Gather whatever photos, video clips, PDF documents, etc. you will be inserting into your online training and put them into a folder(s) on your computer. NAME these appropriately so you can easily pick out the correct one for each page and will understand what these are when you see them in your Media Library.
| Examples: |
|
| Video Clip Name Before: NC2100929.mov | Change to: Placing wheel jack.mov |
| Photo of work light: DCM23108.jpg | Change to: Work light over bench.jpg |
Avoid entering any 'special' characters into file names like / \ ' " { } [ ] * & % ! ( )
Example
Here are page examples of a manual which is ready for conversion to online course:
|
|
|


Create your Module
A "module" is the 'container' in which you put any and all your 'course' content in it. It can contain as little as one item (a page, a question, an exam, a folder, or a survey) or an unlimited number of these in any order you like.
A typical online training course will consist usually of several Content Pages with individual Review Questions every few pages, followed at the end by an Exam and usually a Survey after that.
If it's just an Exam you want, you can make a module with just an Exam in it, however we recommend at least one Content Page before and after the Exam (explained later).
In Training Developer, click Content tab then Modules. Here you will see a button at top right for 'New Module'. Click it. A new Module will be created and you will be put on it's Module Settings page.

Module Settings
Every Module has it's own 'Settings' page (some people call it a Control Panel). You can make all the settings now, or come back and change any of the settings at any time.
| Each item on the Module Settings page has an Info Bubble, marked with an (i) icon. Just click on that icon and an explanation with instructions for that feature will pop up. |
|

Note: By default all the Module Settings are set the way the vast majority of training modules are set by clients. If you are unsure what setting to use, just leave it where it is. You can change it later if you want.
| Minimum Module Time: This forces the Student to remain active within the module for a set amount of time. If you have an operations manual that says you provide a certain amount of time training on a particular subject, then you should set the minimum module time to meet or exceed that time. |
|

Also, it is highly advised to put a regular Content page at the very end of the module which has hyperlinks to or attachments of related subject matter which the Student can read if they finish the module before the Min Module Time has elapsed.
Add Content to your Module
After the Module Settings have been set, you are ready to work with your module in Edit mode. If the Module is closed, just click the Edit icon to open it in Edit mode. YOU CAN EDIT MODULES ONLY IN THE TRAINING DEVELOPER ROLE!
Now all you have to do is fill up the Module with whatever content you like. Click the [+] button to add content. You will see a menu with the several different types of content in it. As you point to each item in the menu, a window pops up with an explanation of each one.

READ the info bubbles on each type of content page BEFORE you begin!
Select the one you want and click on it.
Name Folders and Pages
Try to give each folder and page a name that describes what is on that page. This will help tremendously with finding content in the Navigation Pane (like table of contents).

Avoid adding page numbers to the page titles. If you ever edit your module by adding, deleting, or moving any pages, this will mess up the numbering you created.
Content Page Types
Content
This is a regular 'page' of a course that contains information. It is basically a blank web page. It can be as small or large as you like, however, we strongly recommend each page contain only 1 - 4 paragraphs for effective online learning. If you are converting a printed manual with lots of text into an online course, generally each page of text from your manual would create about 3 - 5 online content pages.
The following can be put on a Content page:
| Text |
Of course, you can type in text onto any content page and use the appropriate toolbar buttons to format it. You can also 'copy' and 'paste' text from Word, PDF, or most other file types. In some cases, you can even select, drag, and drop the text right in (try it to see if it works with your document).
Note that formatting (spacing, bold, indents, special characters, etc.) in documents is completely different software code from what the web uses. Our system does its best to recognize formatting code and re-create that formatting in the web, but it does not always create a result identical to the document you are copying from. Note that web browsers are not capable of handling content like computer based desktop publishing does, and that your content's look is subject to many aspects on the viewer's end like what device they have, how big their browser window is, what default fonts and sizes they have set in the browser, etc. So we recommend keeping text formatting as simply and plain as possible to maximize compatibility for your users. |
| Images |
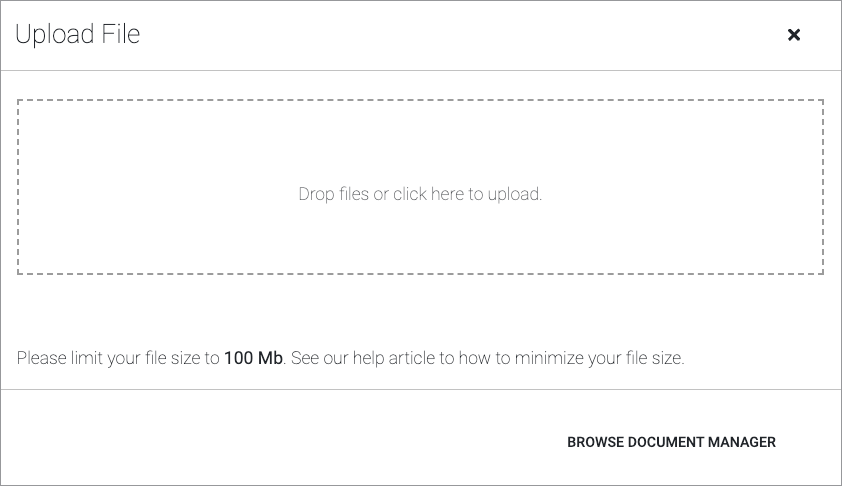
Click the ‘Insert Image’ button. A window opens up and you can drag and drop in an image from your computer, or click the 'Media Library' tab to select an image from your library in the system. When you see the image in the content editor page, you can click on it to select it, then use the Image Properties floating pallet to customize the image. To align the image on the page, click outside the image then use the Text Align toolbar button.
|
| Video |
This system uses an excellent video streaming service, which is like YouTube and Facebook except it uses open standards (non-proprietary) HTML5 format. It works on every type of computer, tablet, smartphone, and web device with every browser on every type of internet connection. When user gets to page with your video, the system actually checks the user’s device and browser type, and internet connection speed, and serves the version optimized for that
You can upload pretty much any common format of video into the system. Just put your cursor in the content wherever it is you want the video to be and click the ‘Insert Video/Sound’ button. A window opens where you can either drag and drop your video in or browse to one on your computer. From there, the process goes like this:
|
| Sounds |
These are basically treated the same as Video above. You use the same ‘Insert Video/Sound’ button. The only difference is that if the system detects it is sound only, then only the player bar will show up
|
|
Adobe Acrobat “PDF” documents can be inserted (“embedded”) into your content by using the ‘Insert PDF’ button. Similar to images and video. Pretty easy.
|
|
| Flash |
Adobe Flash was, at one point, the dominant format for video and multimedia on the web. However, they never made it compatible with mobile devices (iPhones, iPads, SmartPhones, etc.) and thus is has now become virtually extinct. For more information, please read this help article ——-> Adobe Flash Player No Longer Supported You can not add the 'shockwave' type of Flash (.swf) into content, and unfortunately there is no good way to convert .swf files to anything else, however you can use .flv ('Flash Video') files: Simply click the 'Add Media' button, then drag and drop in your .flv file. Our system converts it to streaming video which is totally compatible with every web browser and device. If you have training content that you previously converted to .swf via some kind of software (i.e.: iSpring, Articulate), you may be able to use a newer version of that software to instead export the content at video (.m4v, etc.) or something else. |
| SCORM |
There is also an "Add SCORM Content" button in the toolbar which enables you to import course content made in some popular software programs. Further info is there when you click the button.
|
| Layout of Content Page |
To do things like place images beside text on a page, use Tables. For example, to put a single image beside 2 paragraphs of text:
Click the Tables toolbar button and set the following: Columns: 2 Rows: 1 Width: 100% (include the "%" symbol) Border: 0 Then click Insert. The table will have two 'cells'. Paste the text into one cell, and place the image into the other cell. Save page. When you Preview the page, you will the nice finished result, and the text should adjust if you change the window size. |


ABOUT THE MEDIA LIBRARY: In the old system you had to first upload media files (images, video, etc.) to the ‘Learning Object Library’ before you could insert into your content. You no longer have to do that. However, when you do add media, the system does put a copy of it in the Media Library for you.
You can use this to add that media to future content pages without having to wait for it to upload again. Simply choose the ‘Media Library’ tab in the window that pops up when you click either the Insert Video/Sound, Insert Image, Insert PDF and browse to your file.
Note that your files will retain their file name they had when they get uploaded, so you should, for example, change your picture called “DCM12015.jpg” to “Calibrating_Torque_Tool.jpg” BEFORE you first add it to your content or upload it to the Media Library
Review Question
Powerful tool to ensure students are LEARNING the info and not just skipping through the pages. Just like in classroom when teacher says "Now, Johnny - what did I just say?"

- Put about every few pages, or after any key learning point.
- Student can not move forward until they answer this correctly.
- Answers are randomized every time question loads to prevent cheating.
- You can give feedback to answers, so they learn from answering incorrectly.
- Question is basically a web page, so can be as short or long as you like can contain images, video, sounds, tables, charts, etc.
- Minimum 2 possible answers, no maximum.
Exam
Can be put anywhere, as many as you like, or even stand-alone. Usually put at end of course and, in longer courses, also at end of each chapter/section.

Question types are Multiple Choice, Graphic HotSpot, and Written Answer (must be manually scored).


- Minimum pass mark can be set 0% - 100%. Can enable student to retake on fail. Can be locked out after 1 - 5 fails in a row.
- Always put at least one Content page AFTER an exam in a module. An Exam page should not be the last thing in a module.
- If module is just an exam, put an intro page before it and end page after it.
- Even though an Exam is just a single content page in a Module, the Student sees only one question at a time.
Please refer to the Exams help file for further information ————-> Adding Exam Questions.
Survey
Adding a Survey at the end of your module is a very good idea. This enables the Students to give you feedback on whether their training was effective and perhaps even to ask you any questions about the course.

Surveys have their own Survey Settings page. Click the 'gear' icon in the Survey editor.
Surveys are very similar to Exams except simpler:
- The answers do NOT get shuffled randomly. They will stay in the order your put them (i.e.: Excellent, Good, Average, Below Average, Poor).
- There are only multiple choice and written answer questions.
- There is no scoring of surveys.
- When the student completes the survey, the results instantly get emailed to whoever you set in the Survey Settings to receive them.
Folders
Folders serve no functional action except to sort your content in the Navigation Pane.
Note that you can DELETE a folder and it will delete all the content inside it and it won't be recoverable by any means.
PowerPoint
Please refer to this help article with regards to how upload PowerPoint presentations in our ASCENT Aviation E-training System ————-> PowerPoint Upload
Exam or Survey ONLY
If all you want in your Module is just an Exam or a Survey, that's fine. But for technical reasons, always have at least one Content Page before and after the Exam. You can make the first one just a title page, and the last one something like "You are now finished. Please click the Submit Module".
Check, Publish, and Test
When you are done authoring your module:
- Check it over in Preview. Open in editor, go to page 1, click the Preview (eyeball) button. Page through and proof read the entire module.
- Publish the module. In your Drafts page, click on the module to open the 'tools' drawer, then click 'Publish'. This will make the module available to the Registrar. Once a module is published, you can not make any edits to it other than wording or images on content pages, and once any student has taken the module, you should never make any change in information to it. If you need to make any changes, make a new copy of the module (Save As), edit this new copy and use it, then archive the old one.
IMPORTANT: Always have at least one person 'beta' test the module before you assign it as training. In Registrar, assign it to that student and have them do the entire module, all the way through to receiving the certificate. You will almost always find something that needs to be fixed.