Converting PowerPoint To Online Training
Microsoft PowerPoint (“PPT”) is a computer software program that only runs on a computer with PowerPoint software installed on it. It is not web compatible.
To use PowerPoint content on the web, it must be converted to a web compatible format. This e-training system accepts ALL web compatible formats, so you have a variety of solutions available. You can choose which solution best fits your needs.
© 2026 Aerostudies Inc. All rights reserved. Narration in this video was generated using AI text-to-speech. All content, scripts, and information are written and owned by Aerostudies Inc.
Integrated PowerPoint Import Tool
In September 2020 we launched the all-new PowerPoint import Tool. This has many improvements over the previous one, most notably the ability to retain formatting and also import video, sounds, text & object animations, and slide transitions.

And with this system, you can still insert Review Questions, Full-featured Exams, Surveys, additional content both on the pages and between them.
- In Training Developer role, click 'Content' tab on left, then click 'Modules'
- Then click the [+ New Module] button and select 'From PowerPoint'.
- Here you give the Module a name, then you have the option to give the Module a number of your choosing and select a Module Category.
Note: When you upload a PowerPoint, each slide is automatically converted into its own Content Page, and any animations or actions included (such as text or object movements) will play automatically on each page.
If you notice an issue with a slide or wish to add, remove, or rearrange slides, you can make those changes later in Edit mode by unlocking the navigation pane to reordering the pages or make changes.
- Next you add your PPT file by either dragging it into the box or click "click here to upload" and browse to it. It will upload into your browser, with the progress of that shown in the bar graph.

-
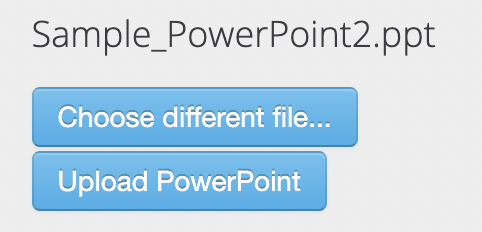
When it's loaded, it will let you "Choose different file..." if you'd like to change the file or "Upload PowerPoint" to confirm the upload. Now just wait for the system to process the conversion.

PowerPoint Conversion Processing
Once you have uploaded your PPT file, the system begins processing it to convert it to a new online Module. Depending on many variables, this can take anywhere from a couple minutes to about an hour. The status of the processing can be viewed in the PowerPoint 'Processing' window which will appear at the top of Modules page, or can be opened by clicking the 'PowerPoint Importing' link.
When the conversion is done, the new module will show in your 'Drafts' Modules page. The system will also send you an email notifying you when it is done. So you can go about other work while our system does the work of converting your PPT into an online training module.

If, due to the complexity of converting some PPT content to web content, conversion fails, the system will send you an email (the email address in the Profile of the account you are logged in to) notifying you of the error and possible cause, and it will also show in the PPT Processing window. Contact our tech support by email or the Help system and we will look into it for you.
NOTE: Some formatting, animations, and slide transitions may not convert exactly the same. If you do not like how something converted, try modifying it (simplifying it is suggested) in the PowerPoint presentation itself, then try importing that again.
Enhancing Your PowerPoint - Make It An Effective Training Course
PowerPoints are usually just bullet point notes that go along with an instructor's talking in a classroom setting, so just importing a PPT itself is probably not going to magically make it a training course. In this system, however, it is very easy to add a few things to your module to make it effective for training.
TIP: With the new imported Module open in Edit mode, click the unlock button in the Navigation Pane, then you can edit the names of each of the pages from the default "Imported Page" to a title specific to the content on that page. This makes it much easier for the editor to find and sort pages, and for the Students to look up information for re-taking exams or reviewing content.
| VOICEOVER for notes/instructions |
Perhaps the quickest and easiest is to use the 'Voiceover' feature. When you import the PPT, select the option to make a separate page for each slide. Then just open the new PPT converted module in Edit mode, go to each page containing the slide content, click the 'Record Voiceover' button in the toolbar, and have the Instructor say whatever they would say about that slide in the classroom. Alternatively you could type out the instructor's notes and add them either on separate Content Pages before or after PPT slide pages, or even directly above or below the PPT slide on the PPT slide pages themselves. |
| Review Questions | Make the PowerPoint effective for self-study, add Review Questions. These should be inserted every few pages or after any key learning point. This will stop the Student from just clicking through without reading the course content. |
| Exam | Add an Exam at the end (or you can put one after each section/chapter) to create an official check and documentation that the Student has learned the information. |
| Survey | You can even add a Survey to get feedback from the Students on the course and their learning experience. |

Other PowerPoint Conversion Methods
Uploading new PowerPoint presentations into existing modules is another method to add more slides to an existing module.

Since this system works with ANY web compatible content, there are several alternative ways of getting PPT content into your training.
NEW: Uploading SCORM content into an existing module or blank module

For more details about SCORM materials, please read this SCORM LIMITATIONS.
Since this system works with ANY web compatible content, there are several alternative ways of getting PPT content into your training.
Build New Module
Although this is the most time consuming option, it may be the best overall because it makes all the content entirely editable, enables you to change the text formatting and page layout, and uses the least internet bandwidth when viewing as a Student, thus faster download speeds.
This is also best for training because PPTs are typically just 'bullet points' that go along with what an instructor says in a classroom training, and thus are not effective for training purposes (but can be good for 'review' or 'recurrent' training). You need to either add the instructional text (what the instructor says) to or in between the slides, which is easily done on the other methods, but can be made into the actual slides themselves.
The downside of this is that you can not do text or image animations, and if your content contains video or sounds, you will need to have those video or sound files available separately to add to the content.
You just create a new blank Module, and then add the full text plus any images, videos, or sounds onto Content Pages.
Note: We recommend writing out all the text in a word processor first, then copy and paste into the online training content - just a bit easier for editing this way.
Slides as Images
This enables you to basically have a picture of each slide of your PPT on a Content page in the system. You will not be able to edit anything within that picture, but you can add content above or below the image on the Content Page, and you can add additional pages (content, Review Questions, Exams, Surveys) between before or after any of these slide image pages.
- One quick way is to simply open your PPT in PPT software, then simply click on the 'thumbnail' image of a slide in the navigation pane on left, and then drag it into an open Content Page in edit mode in your browser. The system will automatically make an image of that slide and insert it on the Content Page.
- You can also take your open PPT and “Save As” and select ‘Pictures’. This makes one .jpg image of each PPT slide and puts them into a folder on your computer. You can then create content pages in your module and insert each image into a page. You may even want to use the ‘Background Image’ option when inserting your PPT images into the system, then that PPT slide will appear as a full content page onto which you can then put additional images and text. The down side of this is that you will not be able to edit anything on the picture of the PPT slide, but you can ADD to that.
PowerPoint As A Video / Movie
Certain versions of PPT enable you to export it as a movie. Make sure you select a standard video output, then use the “Add Video or Sound” button in the system’s editor to upload the video onto a Content Page.
However, in this method you are unable to insert things like Review Questions WITHIN the PPT video and there is limited control of things like viewing speed, and such.
It is recommended you export larger PPTs in sections, thus making multiple video which you can add to Content Pages in your Module, and then put Review Questions about each video clip after it to ensure the Student is watching the video and retaining the info.
About Older Flash Course Content and Video
Many older or 'traditional' learning management systems such as iSpring, Articulate, etc. created online training in the form of Flash files. Browsers no longer support Flash content, thus you can no longer put .flv or .swf files into online training. If using PPT conversion tools, make sure you do not select an export format that outputs as Flash content.
Also, if you have older online training that contains videos or sounds, those may be Flash files too and thus will no longer work on the web. If you have the original video/sound file, you can use our 'Add Video or Sound' toolbar button and drag and drop it into your module content. If you only have the Flash file, you can find tools on the web that can convert that to a standard video or sound file first, then use the toolbar button to pop it into your module.